As an Amazon Associate I earn from qualifying purchases. This page may contain affiliate links.
Dutch clover lawn seed is one of the most practical ways to build a lawn that stays green with less fertilizer, feeds bees and other pollinators, and crowds out some of the weeds that thrive on bare or thin turf. In this guide you will learn how to pick the right seed, prepare your soil, sow at the correct rate and time, and maintain the clover so it spreads through your lawn instead of thinning out. The steps below are written for home lawns in temperate climates, where Dutch white clover (Trifolium repens) is the most common choice.
What Dutch Clover Brings to a Lawn
Dutch clover is a low-growing perennial legume. Its roots host bacteria that pull nitrogen from the air and make it available in the soil, which is why clover-rich lawns often need less supplemental nitrogen than grass-only turf. Its white flowers appear through the growing season and provide nectar and pollen for honey bees, bumble bees, and many native species. For a broader look at how these lawns work, see Clover Lawns Explained.
Clover also tolerates light foot traffic and stays green in dry spells better than many grasses, though it is not a complete substitute for a grass lawn. Most owners plant it as a grass-clover mix, with the clover making up roughly 10 to 30 percent of the stand.
Choosing the Right Dutch Clover Lawn Seed
Not all white clover seed is the same. Varieties differ in leaf size, growth habit, and tolerance of shade or mowing. Standard Dutch white clover has medium leaves and forms a dense, even mat, which suits most lawns. Smaller-leaved types handle frequent mowing better, while larger-leaved types produce more flowers but can look coarser. If you are weighing options, Choosing the Right Clover Variety for Your Lawn compares the main types, and Best White Clover Seed for Lawns reviews seed products by use case.
When you shop, check the label for:
- Species: Look for Trifolium repens (white clover). Avoid seed blends that list inert or unrelated species as the bulk of the mix.
- Purity and germination: Manufacturers typically list both. Higher purity and germination mean more useful seed per ounce.
- Coating: Some clover seed is inoculated with rhizobia bacteria. Inoculated seed can help establishment on soils that have not grown clover before.
- Intended use: Lawn-grade varieties are bred for mowing; pasture types may not perform well under a mower.
Step 1: Test and Prepare the Soil
Clover grows best in soil with a pH between about 6.0 and 7.0. A simple soil test from a university extension office or a home test kit will show your pH and nutrient levels. If your pH is below 6.0, apply lime based on the test recommendation. Lime takes several months to change soil chemistry, so ideally apply it a season before seeding. For a more complete picture of soil testing, read How to Test Your Lawn’s Soil for a Healthy Pollinator Habitat.
Clover needs good drainage. Compacted soil prevents seedlings from establishing, so aerate heavy clay or high-traffic areas before seeding. Lawn Aeration for Better Soil Health and Pollinator Support explains timing and methods. Adding a thin layer of compost also improves structure and microbial life; see Using Compost to Improve Soil for a Bee-Friendly Lawn.
Preparing the Seedbed
- Mow the existing lawn short, at about 1.5 inches, and remove clippings.
- Rake or dethatch to expose soil in bare patches. Aim for soil-to-seed contact.
- Loosen the top 1 to 2 inches of soil where it is compacted.
- Level low spots and fill with a thin layer of screened topsoil or compost if needed.
- Water the area lightly one or two days before seeding so the surface is moist but not muddy.
Step 2: Sow at the Right Rate and Time
Seeding rates depend on whether you are overseeding an existing lawn or starting from scratch. The table below gives typical ranges for Dutch white clover. Always follow the rate printed on your seed bag, since formulations vary.
| Situation | Clover Seeding Rate (per 1,000 sq ft) | Notes |
|---|---|---|
| Overseeding a thin grass lawn | Roughly 1 to 2 oz | Mix with grass seed or broadcast lightly over existing turf |
| New clover-grass mix (about 20 percent clover) | Roughly 2 to 3 oz | Blend thoroughly before spreading |
| Pure clover lawn | Roughly 4 to 6 oz | Higher rate fills in faster; expect slower grass establishment |
In most of the northern US and Canada, the best window is early fall, when soil is still warm and rainfall is more reliable. In the South, early spring or late winter works well. Avoid seeding during the hottest weeks of summer, when seedlings dry out before roots anchor.
Sowing Steps
- Divide the seed in half and spread one half in one direction across the area.
- Spread the second half at a right angle to the first for even coverage.
- Lightly rake or roll the area so seed sits about 1/4 inch into the soil surface. Clover seed is small and should not be buried deeply.
- Keep the surface moist for two to three weeks. Light, frequent watering is better than heavy, infrequent soakings.
Step 3: Establish and Water the New Stand
Seedlings usually emerge in 7 to 14 days when conditions are right. During establishment, water lightly once or twice a day, or enough to keep the top half-inch damp. Once plants have three or four leaves and roots begin to anchor, shift to deeper, less frequent watering. For automation, Setting Up a Watering Timer for a Healthy Lawn explains how to set schedules that avoid overwatering.
Keep foot traffic off new seedlings until they have been mowed at least once. Wait until clover reaches about 3 to 4 inches before the first cut, and cut back to around 2 to 3 inches.
Step 4: Mow, Feed, and Maintain for Pollinators
Mowing height matters for both clover health and flower production. Most mixed lawns do well between 2.5 and 3.5 inches, which lets clover flower without scalping grass. What Is the Ideal Mowing Height for a Pollinator-Friendly Lawn? covers this in detail. Mowing also affects bees directly, so timing matters; Lawn Mowing and Pollinator Habitat offers schedules that protect foraging insects.
Clover generally needs little fertilizer. Phosphorus and potassium may still be needed if a soil test shows deficiency. Avoid heavy synthetic nitrogen, which encourages grass to crowd out clover. Organic, slow-release options are better suited to this system; see Responsible Lawn Product Selection for guidance.
Water deeply but infrequently once the lawn is established. Clover tolerates short dry spells, but prolonged drought thins it. Maintaining a Pollinator Lawn During Drought Conditions has specific tips.
Common Mistakes to Avoid
- Burying the seed. Clover seed needs light contact with soil, not depth. Over 1/4 inch, emergence drops sharply.
- Letting the seedbed dry out. A single dry day during germination can wipe out a sowing.
- Using a high-nitrogen fertilizer. This favors grass and can push clover out within a season.
- Mowing too short. Cutting below 2 inches reduces flowering and weakens the plants.
- Ignoring weeds early. Young lawns are vulnerable. Identify problem plants with Lawn Weed Identification before deciding how to handle them, and avoid broad-spectrum sprays that harm bees.
- Skipping the soil test. Clover in acidic soil struggles to establish no matter how much seed you use.
Tips for Long-Term Success
- Overseed bare patches each fall to keep the clover density up.
- Leave some areas unmown for a few weeks in peak bloom to support late-season foragers.
- Avoid pesticide use on flowering clover, and if treatment is unavoidable, time it outside peak bee activity, as described in Safely Timing Lawn Treatments Around Pollinator Activity.
- Consider adding a few low-growing flowers for variety. Pollinator-Friendly Lawn Alternatives lists options.
Recommended gear
A few tools make clover establishment more even and less wasteful. A broadcast or drop spreader gives more consistent coverage than hand-tossing, which is important for small, lightweight seed. Look for a model labeled for lawn seed and fertilizer, and calibrate it on a small test area first. A simple garden rake or lawn roller helps press seed into the soil surface.
- Handheld broadcast spreader: Useful for small lawns and patch repairs, where even distribution is easy to control. View on Amazon
- Drop spreader: Gives precise rows and fewer overlaps on larger areas. View on Amazon
- Soil test kit: Checks pH and nutrient levels before you buy lime or fertilizer. View on Amazon
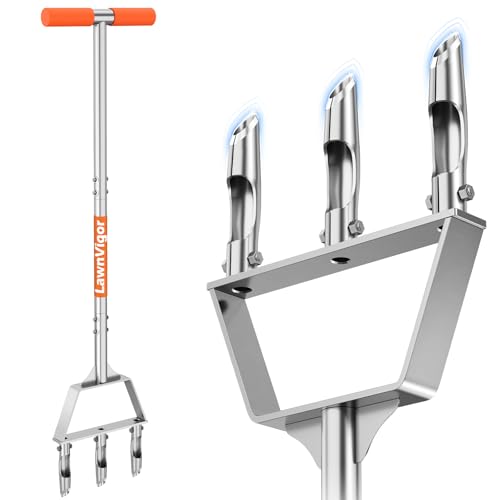
- Core aerator: Opens compacted soil so seed can establish. View on Amazon
FAQ
How long does dutch clover lawn seed take to establish?
Seedlings typically emerge within 7 to 14 days under good moisture and warm soil. A dense, mature stand usually takes one full growing season to form, though clover often shows visible coverage within six to eight weeks.
Can I plant dutch clover lawn seed with grass seed?
Yes. Many owners sow clover at 10 to 30 percent of the total mix with fescue or other lawn grasses. Blend the seeds thoroughly before spreading so the clover is distributed evenly.
Does clover need fertilizer?
Clover fixes its own nitrogen, so it usually needs less than grass. A soil test is the best guide; add phosphorus or potassium only if the results show a deficiency.
Will clover kill my grass?
Clover does not typically kill established grass, but it can compete with it. Keeping nitrogen levels moderate and mowing at a healthy height helps maintain a balanced mix.
Is dutch clover safe for pets?
White clover is generally considered low risk for pets, but eating large amounts of any plant can cause stomach upset. If you have concerns about a specific animal, consult your veterinarian.
How often should I mow a clover lawn?
Mow every one to two weeks during the growing season, keeping the height between about 2.5 and 3.5 inches. Avoid mowing during peak bloom in the middle of the day, when bees are most active.
When is the best time to overseed clover?
Early fall is ideal across most of the US because soil is warm and rain is more dependable. In the South, late winter or early spring also works well.
Can I spray weeds in a clover lawn?
Choose targeted control and avoid broad-spectrum products while clover is blooming. If you are unsure which products are appropriate for your area, a local extension office can advise.
Conclusion
Dutch clover lawn seed gives you a lawn that needs less fertilizer, supports bees and other pollinators, and holds up reasonably well with proper care. Success comes down to three things: testing and preparing the soil, sowing at the right rate and depth, and mowing at a height that lets clover flower. Start with a small test area if you are new to clover, and expand once you see how it establishes on your site.